Balmain inspired cropped tuxedo jacket
Inspiration came from Olivier Rousteing, and this cropped tuxedo jacket appears almost in every season's collection in a different iteration.

Balmain menwear, FW-2016
I chose a navy-black synthetic blend fabric from fabricville. The weight was quite heavy, but it was not horrible to work with. The satin for the lapels came from the same place. Lining fabric came from sultansfinefabrics.com.

I drafted the pattern using Rundschau system (Мюллер, журнал Ателье). It went well, but I see some adjustments required, especially in the back. The sleeve was huge - I took out 6cm in circumference, and still find it wide.


I did not fuse the fronts. I used hair canvass down to the waist, as well as horsehair and French collar canvas for the shoulder area. I made the shoulder pads myself.


The pockets are jetted, however they kept opening up, so I sewed them shut.

There are 3 decorative metal shank buttons on the sleeves. I was relieved to not make buttonholes.


James is happy.

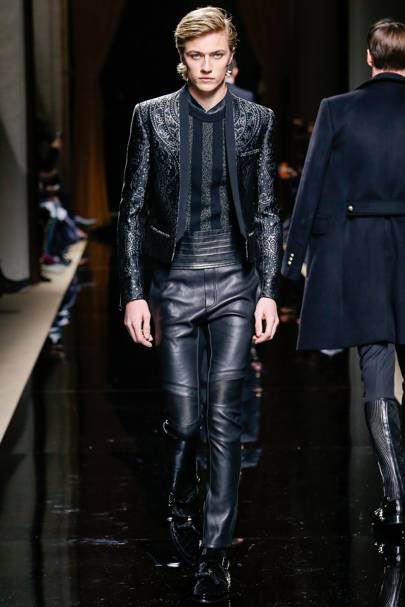
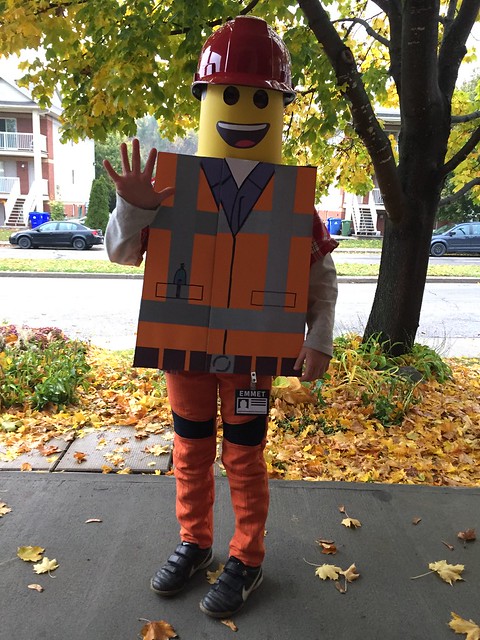
Balmain style orange jeans, Halloween 2016
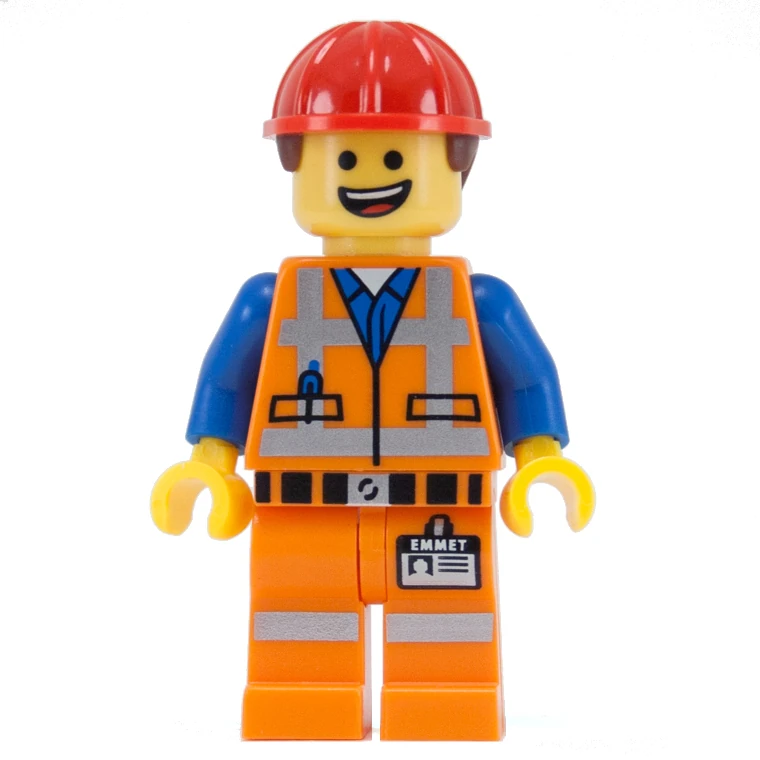
It all started with the Lego Movie's Emmet costume.


My colleague donated a blue hard-hat = which was spray painted red.

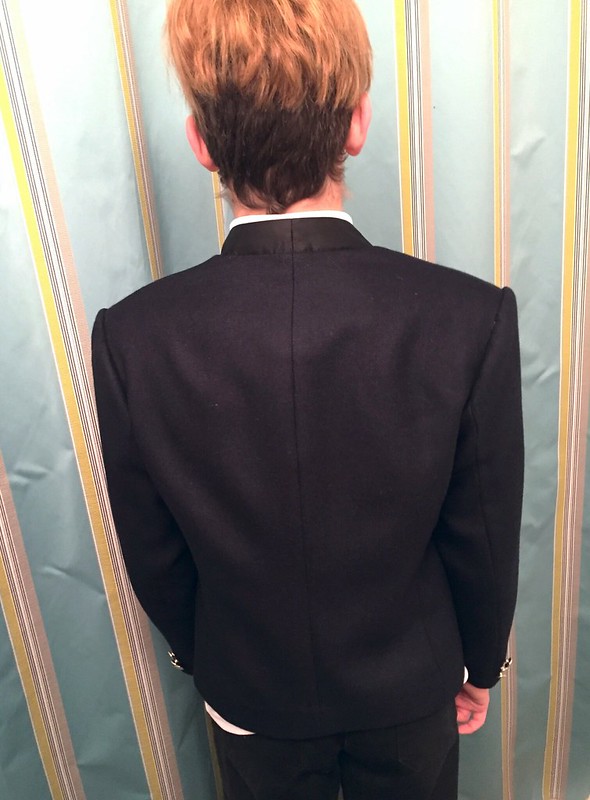
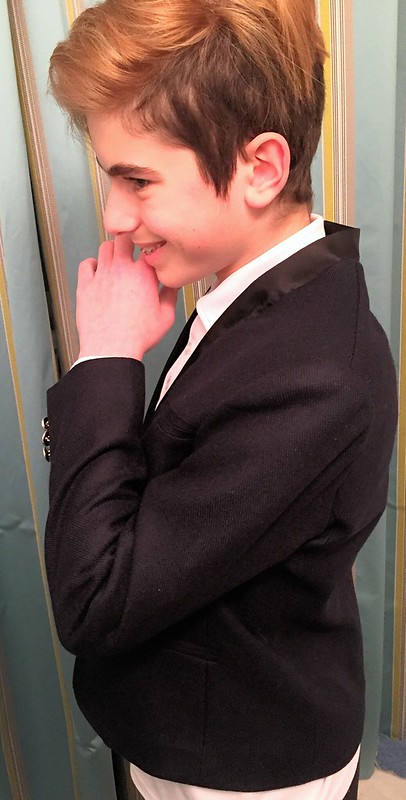
A few sheets of foam core cardboard, orange and yellow cardboard (from Dollarama), colour craft paper, acrylic paint, silver duct-tape, spray and hot glue and markers made the top.


The time came to figure out the bottoms. I itched to sew, and...

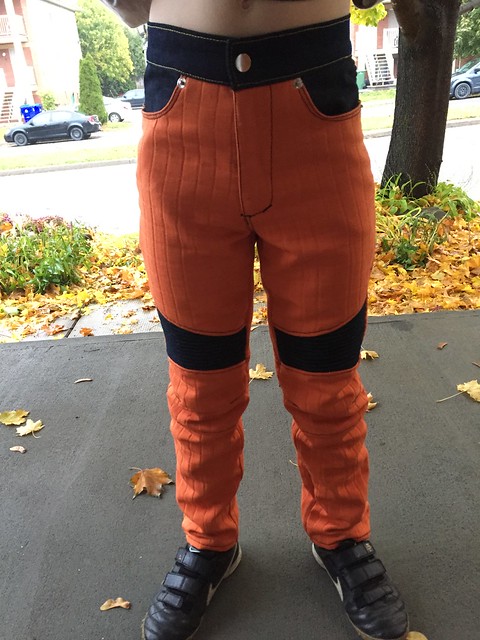
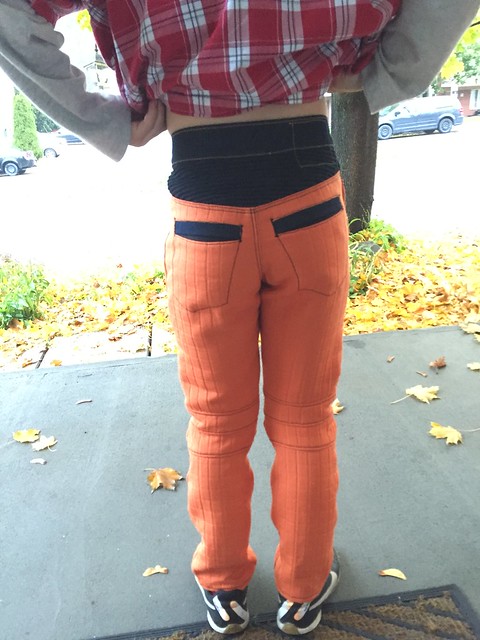
Went shopping for fabric. Had to be cheap - alas, orange upholstery fabric at a whopping $6. Yes, I left Fabricville with just 1m. of fabric!

Drafted a pattern following instruction for Rundschau (Мюллер) method. Introduced biker styling. Made a mental note - do not stack horizontal seams in vertical seams... spread them, space them - will be easier to sew.

I wanted to break the orange with some denim panels, and make those illusive ribbed panels Balmain is famous for. Balmain uses a double needle with an elastic thread at the bottom. The space between two rows is 8mm... My machine can do 4mm max. So... after a lengthy deliberation on a sewing forum, I opted to use a synthetic jersey as a backing.

I stitched two layers of fabric (denim and jersey) with one row of stitches. Then, using the width of my presser foot as a guide, stretched the bottom jersey layer to the max, and run a parallel row of stitches. The denim did not form itself into a nice rib. I persevered. After an hour of stitching this small piece of fabric, I was about to fit my pattern piece on it. I tried massaging the stitched piece, and some form of ribbing started to appear. I decided to spray it with water. And... magic happened. May be water softened denim and allowed the jersey to pull everything together. Just a few rows of ribbing needed persuading. Relieved, I let everything dry before proceeding.

There is nothing special about putting these pants together. Just too many pattern pieces. I hoped for a quick project, but it took me almost 2 full days!


My son was excited about the pants. And my spouse is asking for a pair as well, but may be not orange. Yes or no?
Easter 2014
I attempted at drafting a pattern for my mother is law. I used the same Rundschau (Мюллер - Ателье) system. In my experience, it works well - I did not have to alter much at all.

The fabrics for this project came from Fabricville. Lightweight cotton ($3/m), medium weight black for skirt ($4/m), skirt lining ($3/m), skirt zipper ($2), black buttons for the blouse ($3/50pcs - Ebay).

Ruffle trim around the collar and front placket.

Elie Saab inspired magenta dress
The inspiration for this dress came from Elie Saab's 2014 Resort collection
 
 (c) Elie Saab 2014 Resort
Of course I had to make changes to the design. First of all, the client wanted a dress with long sleeves. Second, the fabric in my stash was a medium-heavy weight one, most likely a synthetic of some kind, not stretchy, with a lovely diagonal ribbing effect. At first, in the store, I assumed it was a ribbed jersey, however... The fabric sewed beautifully, though the colour bled when I decanted the fabric prior to working with it. Did not shrink, I think. And third, the client wanted a more modest gorge treatment.
 
This was my second ever dress made from the Rundschau (Мюллер) pattern. I copied the front and back pieces and freehanded the style lines on them. Then, copied pattern pieces with seam allowances.
 
Construction: there is horsehair interfacing in the front to keep the shape of the upper part of the dress. There are thin hand-made shoulder pads, and sleeve roll pads (bias strips of soft medium weight wool). Invisible zipper (my second in a dress). The dress is fully lined.
 
Front style lines detail
Front neck opening and back lining detail
Lining attached to the bottom of dress
Lapped slit in the back
I had to re-sew the zipper several time to match the back

Back unzipped with lining picking out
 Et voilà. Merci!
Easter 2014
 
Qipao style blouse in cotton
This post will be short.

The idea behind the project was to re-create a beloved blouse from Mango, which we bought in 2002.
I copied the style-lines onto the Rundschau draft to adjust the blouse to the correct size.

The cotton fabric was bought in Fabricville. It sewed like a dream. I would have preferred to have made up the blouse in thin Irish linen, but it is notoriously impossible to purchase in my neighbourhood.

I played with the piping for the first time. I used thin polyester cord inside, and it seemed to work fine. I used a special piping presser foot for the most part, and where sewing elements were too complicated, I resorted to the zipper presser foot for more control.

Covered buttons are my first experience as well. I cannot say I enjoyed it very much, because it takes some persuasion for the fabric to stay inside the top part, and then some more to lock the bottom part of the button in. In some cases I used carpenters glue to keep the whole thing together. The quality of these particular buttons is poor as well and they tend to break.

I used thin elastic cord to create button loops.

And there is an invisible zipper in the side of the body.


These red jeans are my making as well ;-)
Valentino Pre-fall 2015-16
Once again, following upon my 2016 New Year's resolution to use up my fabric stash, I pulled out a gorgeous cotton-silk blend from Fabricville in sage colour. Inspiration for the garment was drawn from this beautiful pre-fall 2015-16 Valentino blouse. I had to shop for trims, as I did, again at the Fabricville store. I bought wide cotton and narrow synthetic lace trims.

This is my first time to show you my working sketch. Not very informative, it narrows down my ideas and gives me a sort of navigation map to where I want the garment to end up. It helps tremendously in the patternmaking process.

Blouse sketch

The pattern follows the basic Rundschau (Мюллер) dress pattern. I omitted waist darts. Created separate pieces for the back and front yokes, chest decoration.

French seems in the making
Back yoke attached to back bodice

Assembled front bodice
Stitching down sleeve lace inlays
Sleeve plackets are ready for cuffs

Fabrication is simple. However, I spent most of the time on the pleats and narrow sleeve lace inlays. Collar gave me a literal back ache. Side and sleeve seams are French seams. Sleeve buttons are shell buttons. Collar has a fabric covered button and a thread chain loop. Oh, and I added a little bit of sparkle to the front lace.

I have to admin that this particular blouse took forever to come together (I started it in October 2015). But hey, spring is almost upon us!


Elie Saab - Resort 2014
In August 2015 we were invited to a wedding of a good friend. My client (obviously) had "nothing" to wear. She was extremely busy with work, so shopping was out of the question.

On the way to the reception. The fabric is merciless and wrinkles badly.

I had a cotton satin blend in gorgeous green colour in my stash. I think I bought it to make a skirt. It had to be made into a dress.

Starting with my Rundschau (Мюллер) dress draft, I drew design lines, and made a pattern. This one had a lot of pattern pieces. To stiffen the front décolleté I used sew-in hair canvas interfacing. It also helped with stability when I started applying crystal claw rivets.

Rivets of doom. They did not want to stay in place!

The dress has hand-made shoulder pads, again with pieces of hair canvas and cotton wadding.

I did not line the dress simply because I did not have any appropriate lining, and because I did not have any budget to go buy anything. As well, it was very hot, and if the lining were synthetic, the client would have been miserable.


The slit in the back is not lapped, and I used grosgrain ribbon (from the Dollar Store - Dollarama) to finish the edges. I used the same ribbon to finish the turned under hem (remember, I don't own an overlock machine). If I remember correctly, I bought the ribbon for a different project altogether.

In the back I used an invisible zipper, even though my preference would have been a metallic zipper with a chunky zipper pull.

Moulin Spa Wakefield, QC - August 2015

What do you think?
Previous Post Older Posts Home